
A client’s IT Support team asked me for a SharePoint site that felt like a real help desk portal, not the default team site with a list of documents. They wanted top navigation, a clean hero area, a big “Raise a ticket” button, training links, upcoming events and the faces of the team.
I built all of it with out-of-the-box web parts, without a single line of code. In this tutorial, I’ll show you exactly how, step by step, so you can customize your own SharePoint site home page the same way.
Quick answer: Create a new page with + New > Page > Blank, add sections and web parts such as Hero, Quick links, Call to action, Events and People, and Publish it. Then go to Site contents > Site Pages, select the page, and choose Make homepage. You need to be a site owner.
What you’ll build
Here’s the finished IT Support home page. Each part below is one section of this tutorial:
| Part of the page | Web part |
|---|---|
| Top navigation instead of the left menu | Change the look > Navigation |
| Hero area with three tiles, a welcome text and buttons | Hero, Text, Quick links (Button layout) |
| “Raise a Support Ticket” banner | Call to action |
| Training resources and FAQs | Quick links (Grid and Button layouts) |
| Upcoming events | Events |
| Meet the team | People |
You can edit the existing home page instead of creating a new one. I prefer a new page, because I can build and test it while the old home page stays live, then switch over in one click.
If you haven’t created the site yet, compare a SharePoint team site vs a communication site first. A communication site gives you full-width sections, and a team site comes with a Microsoft 365 group.
Step 1: Move the navigation to the top
Team sites show the navigation on the left by default. To make the site feel more like a website, move it to the top:
- Open the site, select the Settings gear and select Change the look.
- Select Navigation and choose Horizontal.
- Pick a menu style. Cascading shows sub-links in a drop-down, and Mega menu shows several levels in one wide panel.
- Select Save.

The navigation now runs across the top of the site:

To show some navigation links only to certain people, you can enable audience targeting in SharePoint site navigation.
Change the header and theme
While you’re in Change the look, check two more settings. Header lets you pick a layout (Minimal, Compact, Standard or Extended), a background and your logo. Theme sets the colors that sections and web parts use, so pick it before you build the page.
Step 2: Create a blank page
Select + New > Page, choose the Blank template, and select Create page. Give the page a title, such as IT Support Home. A page can’t be saved without a title.

A new page starts with a Banner web part at the top. It replaced the old title area. For a home page, I don’t need it, so I select it and choose Delete web part from the toolbar on the left. If you change your mind, use Undo or add a Banner web part back.

Step 3: Add the hero section
Select the circled + to add a section and choose a layout. I picked Flexible, which lets me place and resize web parts freely. Other options include one, two or three columns, one-third left or right, and a vertical section on the right.

Open the Toolbox on the right and add the Hero web part. In its properties, choose the Tiles layout and set three tiles. Each tile gets an image, a title and a link. Hero also offers Layers and Carousel layouts, with up to five items.


Next to the hero, I added a Text web part with a heading and a short welcome message. Below it, I added a Quick links web part with the Button layout and a fill color for three of the most-used links. The button color comes from the site theme.
For more layout ideas, see how to use the SharePoint Hero web part and the SharePoint Text web part guide.

The hero section is done:

Step 4: Add a call to action
The most important thing on a help desk page is the way to ask for help. Below the hero, add a new section with the Call to action web part. Add a background image, a short message, the button label Raise a Support Ticket, and the link to your ticket form.
The button link must start with https://, http:// or mailto:.
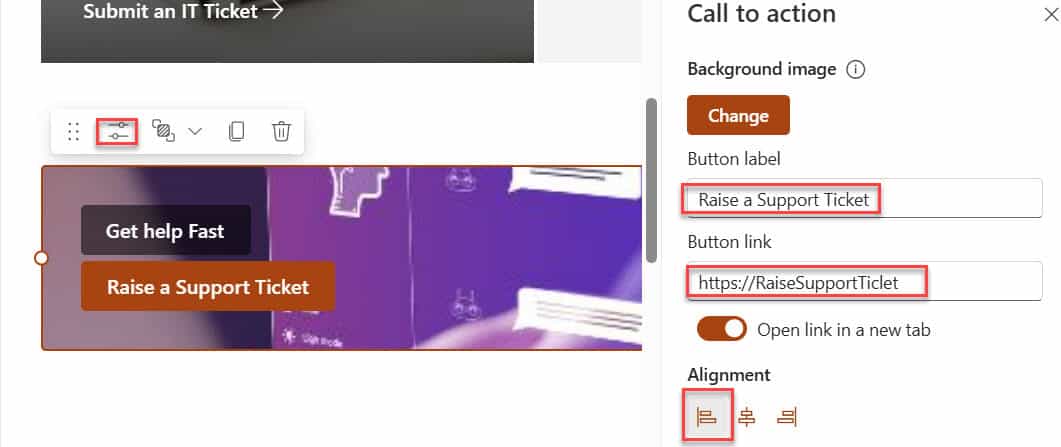

If your team uses Microsoft Forms or a SharePoint list for tickets, link straight to the form. See how to use the Call to action web part for the other settings.
Step 5: Show training resources and FAQs
Add a two-column section. In the left column, add Quick links with the Grid layout, title it Training Resources, and add your links. I added six, with an image for each.
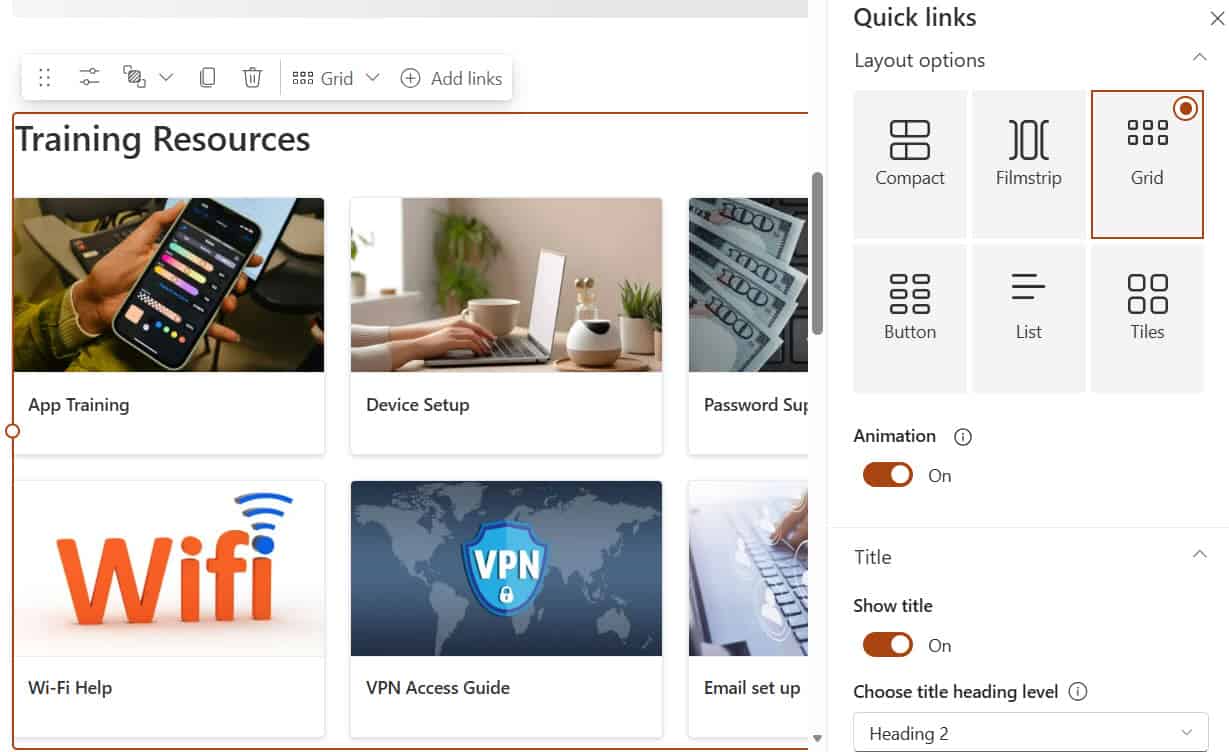

In the right column, add another Quick links web part with the Button layout and no outline, and title it Frequently asked questions. Each button links to an answer page or a document.


Both columns side by side:
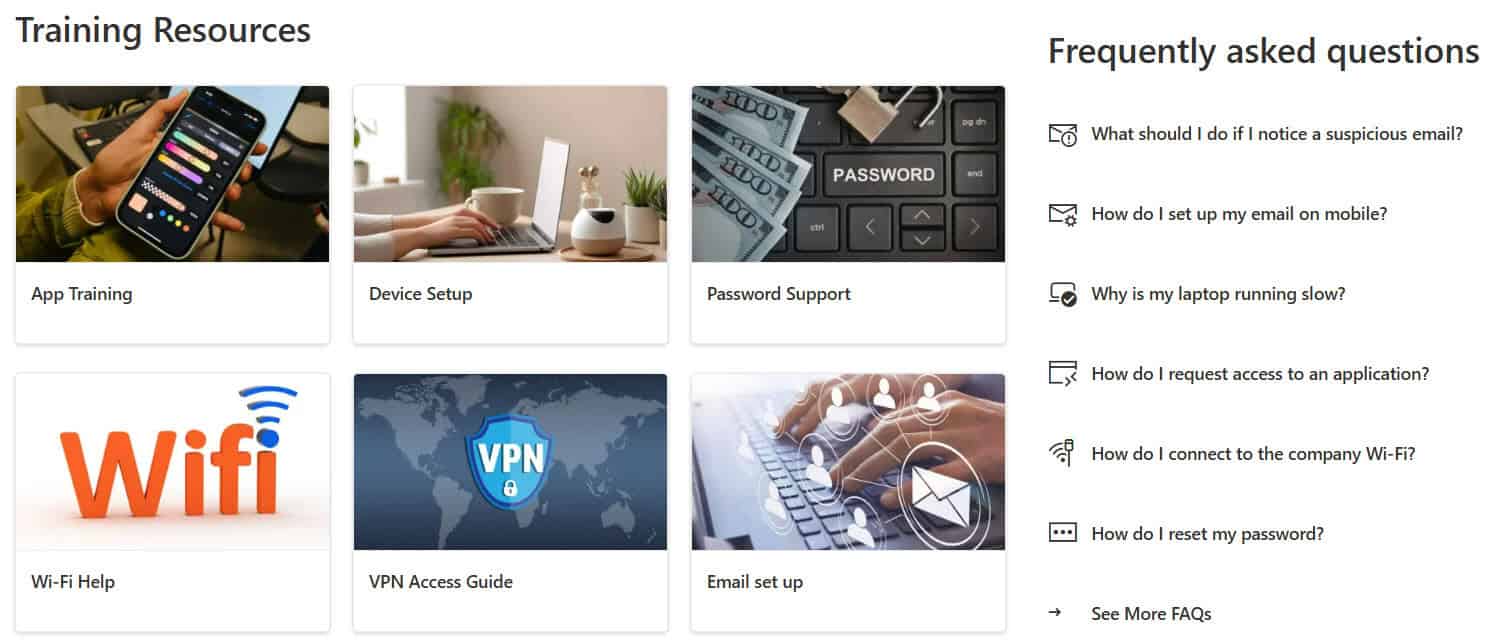
Grid and Button are only two of the six Quick links layouts. The others are Compact, List, Tiles and Filmstrip. You’ll find them all in the SharePoint Quick links web part guide.
Step 6: Show upcoming events
Add the Events web part. I set the Source to Events list on this site and the Date range to All upcoming events. You can also pull events from other sites or a hub, and limit them to this week, the next two weeks, this month or this quarter.

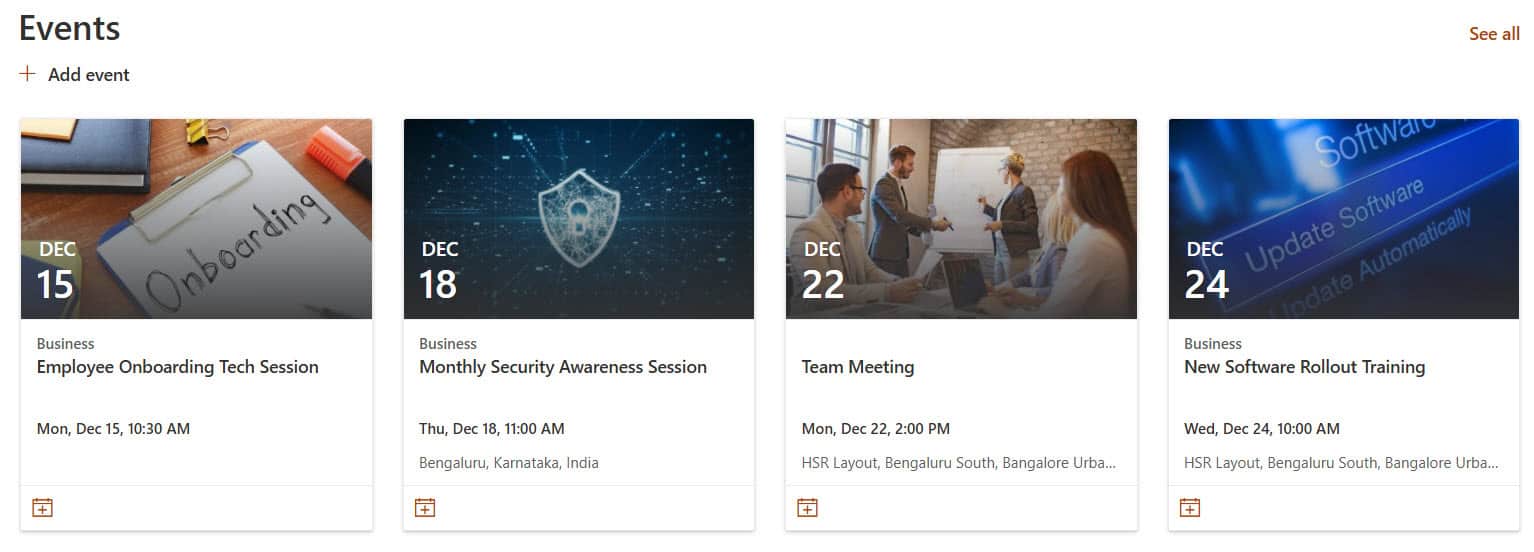
One thing to know: the Events web part doesn’t support recurring events. If your team has a weekly meeting, add those dates as separate events. More options are in the Events web part tutorial.
Step 7: Introduce the team
Add the People web part, title it Meet Our IT Team, and search for each person by name. Pick a layout in the properties. The compact layout keeps it to a photo and name, and the descriptive layout adds a line of text for each person, such as “Microsoft 365 and Teams”.


Photos and job titles come from each person’s Microsoft 365 profile. See the SharePoint People web part guide for more.
Step 8: Publish the page
Until you publish, the page is a draft that only editors can see. Select Publish in the top right. If co-authoring is turned on, you’ll see Save and exit first. After any later edits, select Republish so people see the changes.
Once the page is live, a SharePoint News web part is the easiest way to keep it fresh with team announcements.
Step 9: Make it the site home page
You must be a site owner, and the page must be in the Site Pages library:
- Select the Settings gear > Site contents, and open Site Pages.
- Select your page, then select the … (Show actions) next to it.
- Select Make homepage.

Now, the custom page opens whenever someone goes to the site:

Tips for a home page that people actually use
- Put the one action people need most, like raising a ticket, above the fold.
- Use section backgrounds from the theme to separate areas, instead of extra lines and images.
- Turn on audience targeting in Quick links and Hero if different teams need different links.
- Reuse your layout: open the page’s Save and exit or Publish menu and choose Save as template. You can’t create a template from the page while it’s the home page, so save the template first. See how to create page templates in SharePoint.
- If you want a faster start, + New > Page with AI can draft a page from a prompt, which you then finish with the web parts above.
- For branding that web parts can’t do, like a custom footer on every page, a developer can build an SPFx extension. See this SPFx Application Customizer example.
These tutorials will help you build out the rest of your site:
Frequently Asked Questions
How do I change the home page of a SharePoint site?
Go to Site contents > Site Pages, select the page, open the Show actions menu and choose Make homepage. Microsoft explains it in use a different page for your SharePoint site home page.
Can I customize a SharePoint home page without code?
Yes. Sections and out-of-the-box web parts like Hero, Quick links, Call to action, Events and People cover most intranet home pages.
How do I make a SharePoint site look like a website?
Move the navigation to the top, choose a header layout and theme in Change the look, remove the Banner web part, and build the page with full-width or flexible sections.
Why can’t my users see my changes to the home page?
The page is probably still a draft. Select Publish, or Republish after an edit, and the changes go live for everyone.

I have worked with Microsoft technologies for more than 18 years, including SharePoint, Microsoft 365 and the Power Platform (Power Apps, Power Automate and Power BI), at companies like HP, TCS and KPIT. I started EnjoySharePoint in 2011 to share the solutions I build in real projects with readers in the United States, Canada, the United Kingdom, Australia, New Zealand and beyond. Microsoft has recognized this work with the Microsoft MVP award 13 times since 2014.