
To upload files to SharePoint, open the document library, select Create or upload, and choose Files upload or Folder upload. You can also drag files straight from File Explorer onto the library. For scripted uploads, one PnP PowerShell line does it:
Add-PnPFile -Path "C:\SPGuidesDemo\UploadDemo\Denver Office Lease Summary.txt" -Folder "ESPUploadDemo"It returns the uploaded file, including its new SharePoint address.
In this tutorial, I’ll show you how to upload files to SharePoint four ways: the Create or upload menu, drag and drop, saving from Office, and PowerShell. I’ll also cover folder uploads, duplicate names and the limits that stop an upload.
Quick answer: In the library, select Create or upload > Files upload (or Folder upload), pick what you want, and select Open. Dragging from File Explorer works too. You need at least Contribute permission, and each file can be up to 250 GB.
Before you upload: what you need
Files in SharePoint live in a SharePoint document library, usually the one called Documents. You need Contribute (edit) permission on that library, or you won’t see the upload options.
For this post, I built a demo library called ESP Upload Demo on my EnjoySharePoint site. My sample files sit in C:\SPGuidesDemo\UploadDemo on my PC:
- Denver Office Lease Summary.txt and Regional Sales Q4 2026.xlsx, two single files
- Q4 2026 Marketing Budget.csv, which I upload under a new name
- Client Onboarding, a folder with three files inside it
How do I upload files with the Create or upload button?
This is the method I show new users first, because it works in every modern browser. Open the library, then select Create or upload at the right end of the command bar. In older guides this was a separate Upload button:
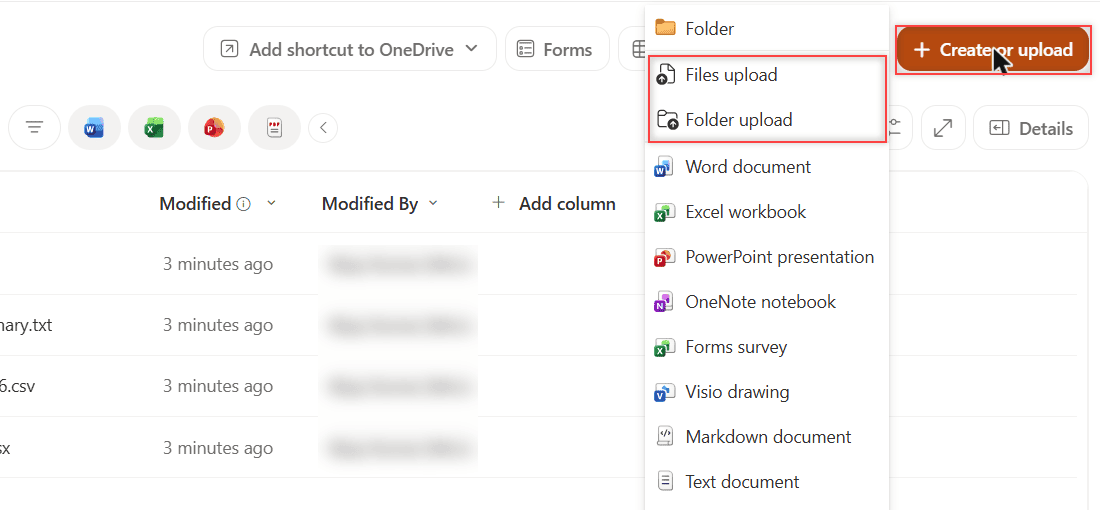
Choose Files upload, select one or more files in the dialog (hold Ctrl to pick several), and select Open. The files show up in the list when the upload finishes.
Each file lands in whatever folder you have open. So open the target folder first, then upload. If you use one folder a lot, pin it to Quick access in the library.
Upload a whole folder
To keep a folder’s structure, select Create or upload > Folder upload and pick the folder. SharePoint recreates it with every file and subfolder inside. Here’s my Client Onboarding folder after its three files went in:
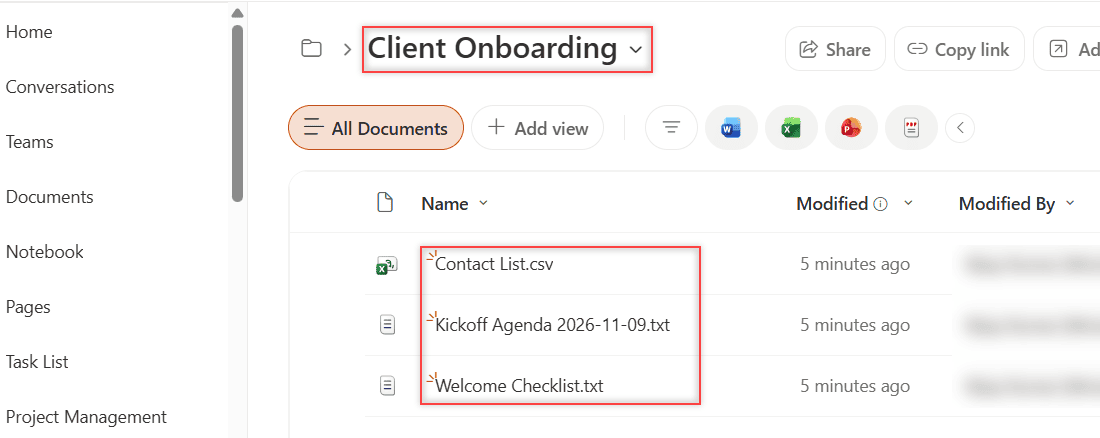
Microsoft says folder upload is built into Microsoft Edge, Google Chrome and Mozilla Firefox. If you only need an empty folder, use Create or upload > Folder instead, or create the folder with Power Automate.
Drag and drop files into SharePoint
Drag and drop is the fastest way when File Explorer is already open. Put the browser and File Explorer side by side, select your files or folders, and drag them onto the library list.
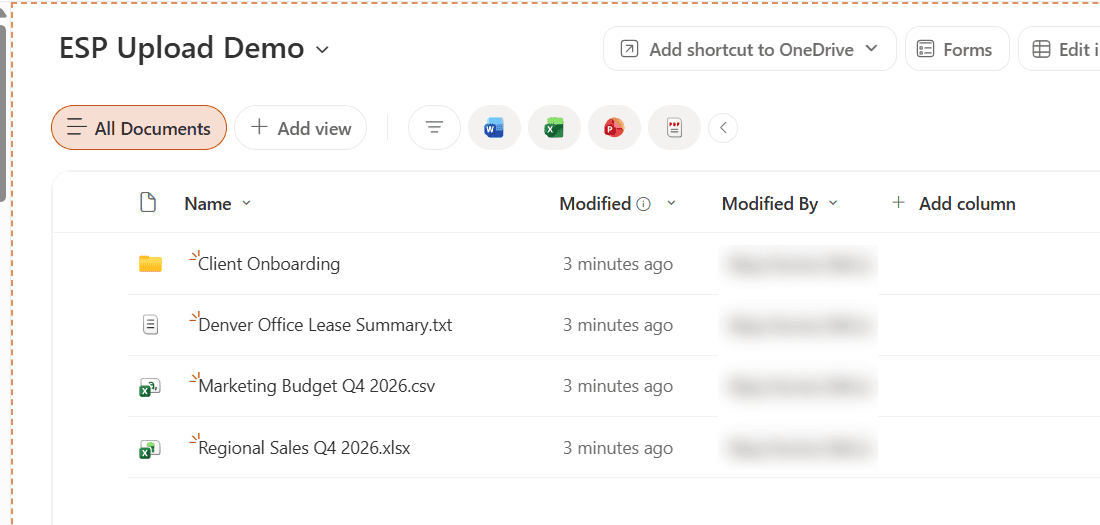
Release when the dashed outline appears around the library. Microsoft notes that drag and drop works best in Microsoft Edge or Google Chrome; in other browsers, use the Create or upload menu. It works the same way in OneDrive, but OneDrive and SharePoint serve different jobs.
What happens if the file name already exists?
In the browser, SharePoint stops and asks you what to do. I dropped Regional Sales Q4 2026.xlsx on the library a second time, and it said it couldn’t upload the file because one with this name already exists:
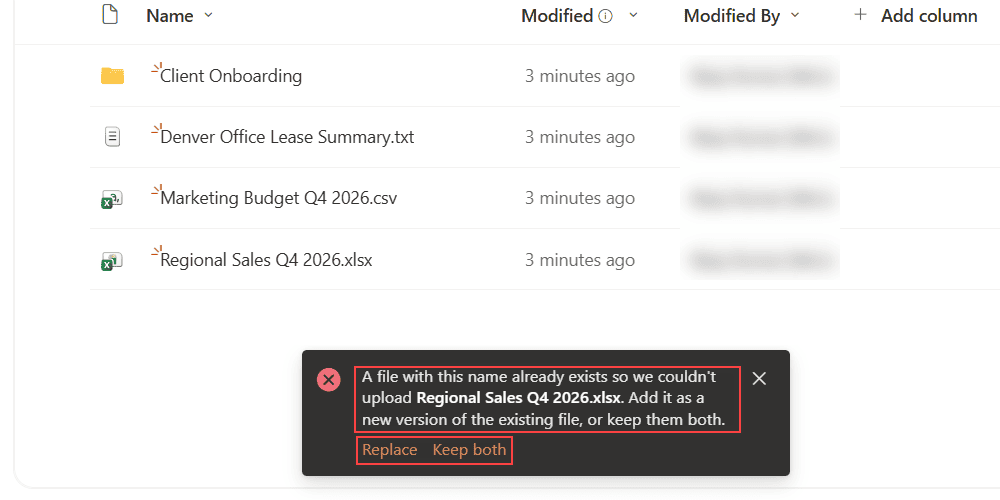
Replace adds your file as a new version of the existing one. Keep both keeps the existing file and uploads yours next to it under a different name. Closing the message uploads nothing.
Because versioning is on by default, a replaced file isn’t lost. Open the file’s Version history to see the older copy. If the library uses check in and check out, your upload stays checked out to you until you check it in.
How to save to SharePoint from Office
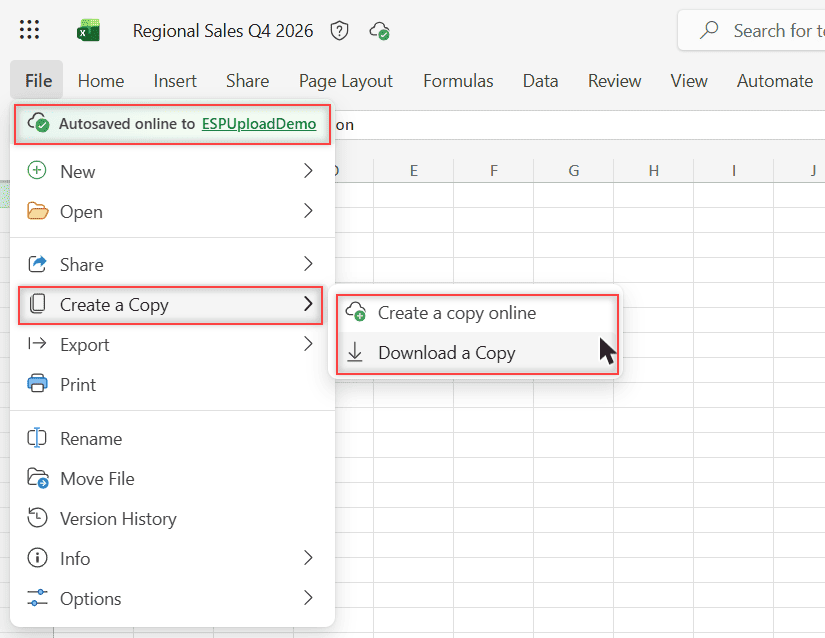
You don’t always need to upload. If you create the file in the library with Create or upload > Word document (or Excel workbook, or PowerPoint presentation), it opens in Office for the web and saves to SharePoint automatically. The File menu even says Autosaved online to followed by the library name.
To copy a file that’s already open in Office for the web, go to File > Create a Copy. Excel for the web offers Create a copy online and Download a Copy:
In the desktop apps, use File > Save As > Browse and paste the library address into the file name box. Files you save in a Teams channel also land in SharePoint; here’s how OneDrive, SharePoint and Teams store files.
Upload files to SharePoint with PowerShell (Add-PnPFile)
PowerShell pays off when you upload the same kind of files often. I use the PnP.PowerShell module (version 3.3.0 here). Connect to the site first:
Connect-PnPOnline -Url "https://<tenant>.sharepoint.com/sites/EnjoySharePoint" -Interactive -ClientId "<app-id>"Then upload one file. -Folder takes the library’s URL name, which is ESPUploadDemo for my library, not the display name:
Add-PnPFile -Path "C:\SPGuidesDemo\UploadDemo\Denver Office Lease Summary.txt" -Folder "ESPUploadDemo" |
    Select-Object Name, Length, ServerRelativeUrl
On my site it returned this:
Name              : Denver Office Lease Summary.txt
Length            : 140
ServerRelativeUrl : /sites/EnjoySharePoint/ESPUploadDemo/Denver Office Lease Summary.txt
Length is the file size in bytes, and ServerRelativeUrl is where the file now lives. For a form-based option, see uploading files from Power Apps.
Rename the file and set metadata during upload
Add -NewFileName to store the file under a different name, and -Values to fill library columns in the same call. The keys are the columns’ internal names:
Add-PnPFile -Path "C:\SPGuidesDemo\UploadDemo\Q4 2026 Marketing Budget.csv" -Folder "ESPUploadDemo" `
    -NewFileName "Marketing Budget Q4 2026.csv" -Values @{Title = "Q4 marketing budget"}
The file arrived as Marketing Budget Q4 2026.csv, and the Title column read back as “Q4 marketing budget”. If you’d rather click than script, see uploading files with Power Automate Desktop.
Upload every file in a local folder
To push a whole folder, loop over it with Get-ChildItem and pipe each file to Add-PnPFile:
Get-ChildItem -Path "C:\SPGuidesDemo\UploadDemo\Client Onboarding" -File | ForEach-Object {
    Add-PnPFile -Path $_.FullName -Folder "ESPUploadDemo/Client Onboarding"
} | Select-Object Name, ServerRelativeUrl
All three files uploaded. The Client Onboarding folder didn’t exist in the library yet, and Add-PnPFile created it on the fly:
Name                          ServerRelativeUrl
----                          -----------------
Contact List.csv              /sites/EnjoySharePoint/ESPUploadDemo/Client Onboarding/Contact List.csv
Kickoff Agenda 2026-11-09.txt /sites/EnjoySharePoint/ESPUploadDemo/Client Onboarding/Kickoff Agenda 2026-11-09.txt
Welcome Checklist.txt         /sites/EnjoySharePoint/ESPUploadDemo/Client Onboarding/Welcome Checklist.txt
Add -Recurse to Get-ChildItem only if you also build the matching subfolder path for each file.
Does Add-PnPFile overwrite existing files?
Yes, and it doesn’t ask. Unlike the browser, there’s no Replace or Keep both prompt. I ran the first upload again, then checked the versions:
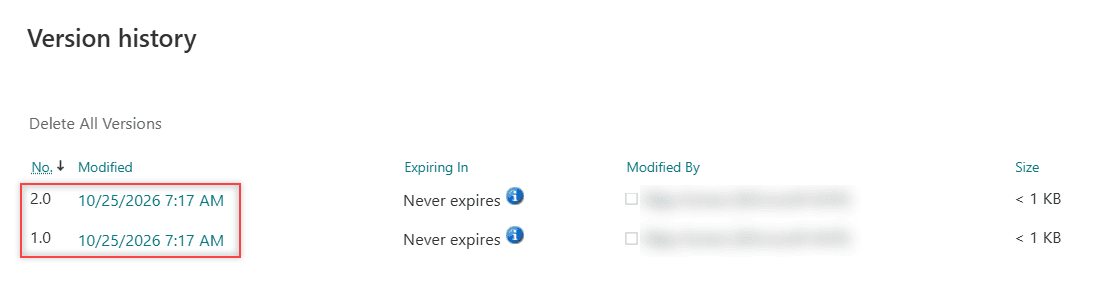
Get-PnPFileVersion -Url "/sites/EnjoySharePoint/ESPUploadDemo/Denver Office Lease Summary.txt" | Select-Object VersionLabel, CreatedThe file was now version 2.0, and version 1.0 was kept in history. Here’s the same thing in the browser:
If versioning is off on a library, that overwrite is final. Check with Get-PnPFile first when you’re not sure the name is free.
Why won’t my file upload to SharePoint?
When an upload fails, it’s almost always one of these:
- No permission. You need Contribute rights; the library may also have unique permissions on the library.
- Blocked characters or names. Names can’t contain
" * : < > ? / \ |, start with~$, or be reserved names like CON or desktop.ini. - Path too long. The folder path plus file name can’t be more than 400 characters.
- File too big. The limit is 250 GB per file, but Microsoft suggests the sync app for anything over a few GB.
If the upload options are missing or an upload seems stuck, clear the SharePoint cache and try again. For big folders you work in every day, sync or add a shortcut to OneDrive instead of uploading by hand.
If the file must show up only after review, the library may use content approval in the library; your upload stays visible only to you until someone approves it.
A few more ways to get files into SharePoint:
If a big video or CAD file won’t go up, check my guide to SharePoint file size and path limits first; it covers the 250 GB per-file cap and the 400-character path rule. And once your files are in, moving files in SharePoint with Move to or drag and drop shows what carries over with each file.
Frequently Asked Questions
How do I upload files to SharePoint from my computer?
Open the document library in your browser, select Create or upload, choose Files upload or Folder upload, and pick what you want to upload. You can also drag files from File Explorer onto the library page.
What is the maximum file size I can upload to SharePoint?
Each file can be up to 250 GB, and the full path including the file name can’t be more than 400 characters. Microsoft lists both in SharePoint limits.
Can I upload a folder to SharePoint?
Yes. Select Create or upload, then Folder upload, or drag the folder onto the library. SharePoint keeps the folder structure and every file inside it.
Why can’t I see the upload options in SharePoint?
You probably have only Read permission on that library. Ask the site owner for Edit or Contribute access, or check whether the library has its own permissions.

I have worked with Microsoft technologies for more than 18 years, including SharePoint, Microsoft 365 and the Power Platform (Power Apps, Power Automate and Power BI), at companies like HP, TCS and KPIT. I started EnjoySharePoint in 2011 to share the solutions I build in real projects with readers in the United States, Canada, the United Kingdom, Australia, New Zealand and beyond. Microsoft has recognized this work with the Microsoft MVP award 13 times since 2014.