JSLink is a SharePoint feature that provides a powerful way to customize the appearance and behavior of SharePoint list views and forms using client-side scripting.
JSLink allows you to:
- Customize any SharePoint view using pure client-side script without writing server-side code
- Apply conditional formatting to SharePoint lists through JavaScript and HTML modifications
- Transform the displayed values in list views to present data in more meaningful ways
- Render custom WebParts by leveraging SharePoint’s built-in JSLink technology
- Filter data in SharePoint lists to display only relevant information
JSLink combines JavaScript, HTML, and CSS elements to customize SharePoint interfaces, giving developers significant control over how data is presented to users.
It’s worth noting that Microsoft now recommends migrating from JSLink to SharePoint Framework (SPFx) extensions for modern SharePoint experiences, as it represents the newer development model.
SharePoint JSLink Examples
Now, let me show you some real examples I have used while working with various clients. If you are using classic SharePoint, then you can use these examples.
Example 1: Customize SharePoint List View % Complete Field
Let us see how to use JSLink in List view in a task list in SharePoint. Here we will see how to give a visual interface to the % Complete field in the task list in SharePoint.
The % Complete field shows data like 40%, 20%, or 30% completed, but by using SharePoint JSLink, we can display the results in color code.
- Log in to your SharePoint site and create a Task as shown in the screenshot below.

- Next, I will add the progress bar in % Complete instead of showing in %. So here I have added a few lines of code that we can use to add the progress bar to the list view. I just added a Script editor Web part and placed my code.

- You can see the full code in the snippet below.
<script>
(function () {
var overrideCtx = {};
overrideCtx.Templates = {};
overrideCtx.Templates.Fields = {
'PercentComplete': { 'View': renderPercentComplete }
};
SPClientTemplates.TemplateManager.RegisterTemplateOverrides(overrideCtx);
})();

function renderPercentComplete(ctx) {

    var fieldVal = ctx.CurrentItem[ctx.CurrentFieldSchema.Name];
    var percentComplete = fieldVal.toString().replace(" ", "");

    var html = '';
    html += "<div style='width:100%;height:20px;border:1px solid #AEAEAE;position:relative;'>";
    html += "<div style='background-color:red;height:100%;width:" + percentComplete + ";'></div>";
    html += "<p style='width:100%;text-align:center;position:absolute;top:0px;left:0px;margin:0px;'>";
    html += percentComplete;
    html += "</p>";
    html += "</div>";

    return html;
}
</script>- Once you place your code inside a Script Editor Web part in SharePoint, click on the OK button, and you will see the O/p as shown below.

Check out SharePoint modern list view customization example
Example 2: Customize SharePoint List View (Border)
Here, I have a SharePoint online custom list known as Training. And if I add a web part page and add the list view web part page, then the list will look like below:

Write the code below and save it as a JS file.
(function () {
var overrideContext = {};
overrideContext.Templates = {};
overrideContext.Templates.Header = “<h2>SharePoint Trainings</h2>”;
overrideContext.Templates.Item = overrideTemplate;
SPClientTemplates.TemplateManager.RegisterTemplateOverrides(overrideContext);
})();

function overrideTemplate(ctx) {
return “<div style=’font-size:18px;border:solid 1px Silver;margin-bottom:6px;padding:4px;width:200px;’>”
+ ctx.CurrentItem.Title
+ “</div>”;
}
If you understand the code, we have declared a method without a name, which will be the starting point.
Then we declare an overrideContext variable. Then we declare Templates like below:
overrideContext.Templates = {};The above will reference all the templates we want to override the styling. Here to style entire items, we can write like below:
overrideContext.Templates.Item = overrideTemplate;Here, overrideTemplate is another method that will contain the styling.
Here I have added a header like below:
overrideContext.Templates.Header = "<h2>SharePoint Trainings</h2>";Then we can register the override like below:
SPClientTemplates.TemplateManager.RegisterTemplateOverrides(overrideContext);Then in the overrideTemplate we are passing the ctx parameter which is the list context and will be used to render the list items based on what is inside this function.
Then, upload the JS file to the site asset document library and copy the file path URL.
Then edit the web part page where the list view web part is. If you edit the list view web part, you can see one property, JS Link, like below. Here is the path like below:
~site/SiteAssets/MyJSLink.js
Here, try to give the path using the URL token like below:
- ~site: which will provide the current site URL
- ~sitecollection: provides the site collection URL
- ~layouts: URL of the _layouts/15 folder
If you try to give a full path like below, it might not get the path correctly.
https://tsinfotechnologies.sharepoint.com/sites/Marketing/SiteAssets/MyJSLink.jsSo you can give the path like below:
~site/SiteAssets/MyJSLink.jsNow, save the page and refresh the page, the list view web part will appear like below:

This is all about changing the Task List View using SharePoint Online JSLink.
Check out Gantt Chart View in SharePoint Online Modern List Using JSON
Example 3: SharePoint jslink list view (SharePoint jslink template.fields)
I will show you how to use the SharePoint jslink template in this example.fields attribute.
I will show you how to render a choice column differently using jslink in SharePoint Online.
Here, for this particular jslink SharePoint demo, let us create a custom list that has two columns (Title and Status) in the SharePoint Online site. Status is a choice column that has values like:
- Started
- In progress
- Completed
Let us add a few items to the SharePoint list, and after adding items, the list looks like this:
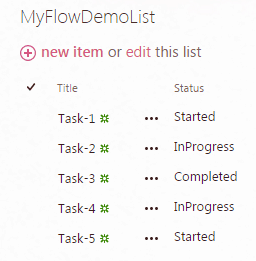
In SharePoint Online, we want to show the status as an image with a different color instead of as text.
For example, it will show a yellow image if the status is started, green if it is completed, and so on.
Add the code below, save the file as a .js file, and then upload the file to the SiteAssets document library in SharePoint Online.
(function () {
var overrideContext = {};
overrideContext.Templates = {};
overrideContext.Templates.Fields =
{
‘Status’: { ‘View’: overrideTemplate }
};
SPClientTemplates.TemplateManager.RegisterTemplateOverrides(overrideContext);
})();

function overrideTemplate(ctx) {
var status = ctx.CurrentItem.Status;
var image = “”;

if (status == “Started”)
image = “https://tsinfotechnologies.sharepoint.com/sites/Marketing/SiteAssets/started.png”;
if (status == “InProgress”)
image = “https://tsinfotechnologies.sharepoint.com/sites/Marketing/SiteAssets/inprogress.png”;
if (status == “Completed”)
image = “https://tsinfotechnologies.sharepoint.com/sites/Marketing/SiteAssets/completed.png”;
return “<img class=’status-image’ src=’” + image + “‘ data-val=’” + status + “‘ />”;
}
If you look at the code, the overrideTemplate function, based on the Status, sets up the image file.
Then, let us create a web part page and add the list to the web part page in SharePoint Online. Then edit the list view web part and in the Edit web part properties dialog box, expand the Miscellaneous section and add the JS link path like below:
~site/SiteAssets/mydemojslink.js
Then, save the page, and we can see that instead of text, images will appear in the SharePoint list view like below:

This is how to use the SharePoint jslink template.fields.
Check out Create and Manage Task List in SharePoint
Example 4: SharePoint jslink template.fields (override multiple fields)
Let us see another example on how to override multiple fields using jslink SharePoint.
If you want to override multiple fields in a list view web part using jslink in SharePoint, then you can add like below:
overrideContext.Templates.Fields =
{
‘Status’: { ‘View’: overrideTemplate },
‘Title’: { ‘View’: overrideTitleTemplate }
};
And the whole code looks like this:
(function () {
var overrideContext = {};
overrideContext.Templates = {};
overrideContext.Templates.Fields =
{
‘Status’: { ‘View’: overrideTemplate },
‘Title’: { ‘View’: overrideTitleTemplate }
};
SPClientTemplates.TemplateManager.RegisterTemplateOverrides(overrideContext);

})();

function overrideTemplate(ctx) {
var status = ctx.CurrentItem.Status;
var image = “”;
if (status == “Started”)
image = “https://tsinfotechnologies.sharepoint.com/sites/Marketing/SiteAssets/started.png”;
if (status == “InProgress”)
image = “https://tsinfotechnologies.sharepoint.com/sites/Marketing/SiteAssets/inprogress.png”;
if (status == “Completed”)
image = “https://tsinfotechnologies.sharepoint.com/sites/Marketing/SiteAssets/completed.png”;
return “<img class=’status-image’ src=’” + image + “‘ data-val=’” + status + “‘ />”;
}
function overrideDescTemplate(ctx) {
return “<span style=’font-weight:bold;’>” + ctx.CurrentItem.Title + “</span>”;
}
This is how to use jslink in SharePoint template fields.
Read SharePoint User Information List
Example 5: SharePoint JSLink Title Column
Here I will show you how to make the SharePoint list title column or field read-only using SharePoint jslink and SPClientTemplates. We will make the SharePoint title column read-only in the edit form.
My client asked me to implement a quick change by making the Title field read-only when an item is edited. This change must be quick and not include any Visual Studio code.
I have implemented a solution using SPClientTemplates and added this as a jslink reference as part of the view in the list item edit page in SharePoint.
Please follow the steps below to achieve this:
Copy the below code block and save it as “ttlReadOnlyEditPage.js”
var EnjoySharePoint = EnjoySharePoint || {};
EnjoySharePoint.TitleFieldReadOnly = function () {
varctx= {};
ctx.Templates= {};
ctx.Templates.Fields= {
Title: {
DisplayForm:null,
EditForm:EnjoySharePoint.TitleReadOnly,
NewForm:null,
View:null
}
};
SPClientTemplates.TemplateManager.RegisterTemplateOverrides(ctx);
};
EnjoySharePoint.TitleReadOnly = function (ctx){
returnSPField_FormDisplay_Default(ctx);
};
EnjoySharePoint.TitleFieldReadOnly();
Copy/upload the JS file onto the site assets / any document library.

Open the SharePoint list and click on any list item. Edit the list item.
Click on the edit page option as part of the site setting gear icon. Edit the list view webpart and find the miscellaneous zone.
Refer to the JS file copied in the Asserts library and apply the changes.

Save the page, and now you can see the Title field appears read-only like below:

This is to make the Title column or field read-only using SPClientTemplates and JSLink in the SharePoint Online Edit form.
Read Customize SharePoint list forms with Power Apps based on conditions
Example 6: SharePoint JSLink Templates.header Example
Let us see another example of SharePoint JSLink templates.header. You will learn how to add a header and a footer to a list view web part using JSLink in SharePoint.
In this particular JSLink SharePoint Online example, I am going to show how you can add a header and footer to a list view web part in SharePoint Online. I will also add a custom message for the header and footer.
Here we have a SharePoint Online list known as Training, and I have added the list inside a web part page. The SharePoint Online list appears inside the web part page like below:

To use jslink inside a list view web part, we first have to save the below code in a .js file.
(function () {
var overrideContext = {};
overrideContext.Templates = {};
overrideContext.Templates.Header = overrideCustomHeader;
overrideContext.Templates.Footer = overrideCustomFooter;
SPClientTemplates.TemplateManager.RegisterTemplateOverrides(overrideContext);
})();

function overrideCustomHeader() {
return “<h3>Our Custom Header</h3>”;
}

function overrideCustomFooter() {
return “<h3>Our Custom Footer</h3>”;
}
I have now added the .JS file inside the Site Assets document library in SharePoint Online. Once we save the file, we need to provide the .js file path in the JS Link in the list view web part.
Open the SharePoint Online web page where you added the list view web part. Then edit the list view web part, from the web part properties expand the Miscellaneous section and provide the JS link file page in the JS Link option like below:

~site/SiteAssets/JSLinkHeaderFooterTest.jsAfter you save the SharePoint web part page, you can see the custom header and footer appear for the list like below:

This is how to add a header and footer to a list view web part in SharePoint Online using JSLink by using SharePoint JSLink templates.header.
Read Customize SharePoint site page
Example 7: Customize SharePoint list view using jslink
Here we will see another example of how to customize a SharePoint list view using jslink.
Here I have a SharePoint Online list with a column known as “PercentComplete, ” a single line of the text column. And I have added the list inside a web part page, and the SharePoint list looks like this:

Here, instead of showing a percentage column like the one above, we can render it differently using JSLink in SharePoint Online.
First, save the code below in a JS file and upload it to a document library in SharePoint Online. Here, I have uploaded the file to the Site Assets document library.
(function () {
var overrideCtx = {};
overrideCtx.Templates = {};
overrideCtx.Templates.Fields = {
‘PercentComplete’: { ‘View’: renderPercentComplete }
};
SPClientTemplates.TemplateManager.RegisterTemplateOverrides(overrideCtx);
})();

function renderPercentComplete(ctx) {
var fieldVal = ctx.CurrentItem[ctx.CurrentFieldSchema.Name];
var percentComplete = fieldVal.toString();
var html = ”;
html += “<div style=’width:100%;height:20px;border:1px solid #AEAEAE;position:relative;’>”;
html += “<div style=’background-color:#0072C6;height:100%;width:” + percentComplete + “;’></div>”;
html += “<p style=’width:100%;text-align:center;position:absolute;top:0px;left:0px;margin:0px;’>”;
html += percentComplete;
html += “</p>”;
html += “</div>”;
return html;
}
Then we need to edit the web part page where we have added the list. Then edit the List view web part. There you will be able to see the JSLink property. They give the path like below:
~site/SiteAssets/MyJSLinkRender.js
Now, once you save the page, the list view web part “PercentageColumn: will look like below:

This is how to use jslink in SharePoint to customize list view web parts.
Check out Customize SharePoint Modern list form using JSON
Example 8: Load multiple JS files in JSLink SharePoint
Now, let me show you how to load multiple JS files in SharePoint using JSLink.
To give a path to a JS file in JSLink, first, we need to edit the properties of the list view web part, and then under the Miscellaneous section, we can add the JS link path like below:
~site/SiteAssets/mydemojslink.jsAnd the web part properties look like this:

But sometimes you may need to give multiple files if you want to load any other scripts.
We can add multiple files by simply using a pipe symbol between them.
~site/SiteAssets/mydemojslink.js|~site/SiteAssets/myanotherdemojslink.jsThis is how to load multiple JS files in JSLink SharePoint.
In this tutorial, we learned how to use JSLink in SharePoint to customize SharePoint list views with these real examples.
You may like the following SharePoint tutorials:
- SPFx Application Customizer Example
- How To Reset Id In SharePoint List
- Add Item to SharePoint List Using Power Automate

After working for more than 18 years in Microsoft technologies like SharePoint, Microsoft 365, and Power Platform (Power Apps, Power Automate, and Power BI), I thought will share my SharePoint expertise knowledge with the world. Our audiences are from the United States, Canada, the United Kingdom, Australia, New Zealand, etc. For my expertise knowledge and SharePoint tutorials, Microsoft has been awarded a Microsoft SharePoint MVP (12 times). I have also worked in companies like HP, TCS, KPIT, etc.


Excellent tutorial thank you !