
If you need a second list that works exactly like one you already have, don’t rebuild it column by column. SharePoint’s Existing list option copies the columns, views and formatting into a new list in about a minute.
Where people get stuck is the data. That option copies the structure only, so the new list starts empty, and the old Save list as template route is missing on most modern sites.
In this tutorial, I’ll show you how to copy sharepoint list structure on the same site or another site, how to bring the items along, and which method fits which job.
The sample list we’ll use
Every method below starts from the same list on my EnjoySharePoint site, ESP Purchase Requests. If you’re new to lists, my guide on what a SharePoint list is covers the basics first.
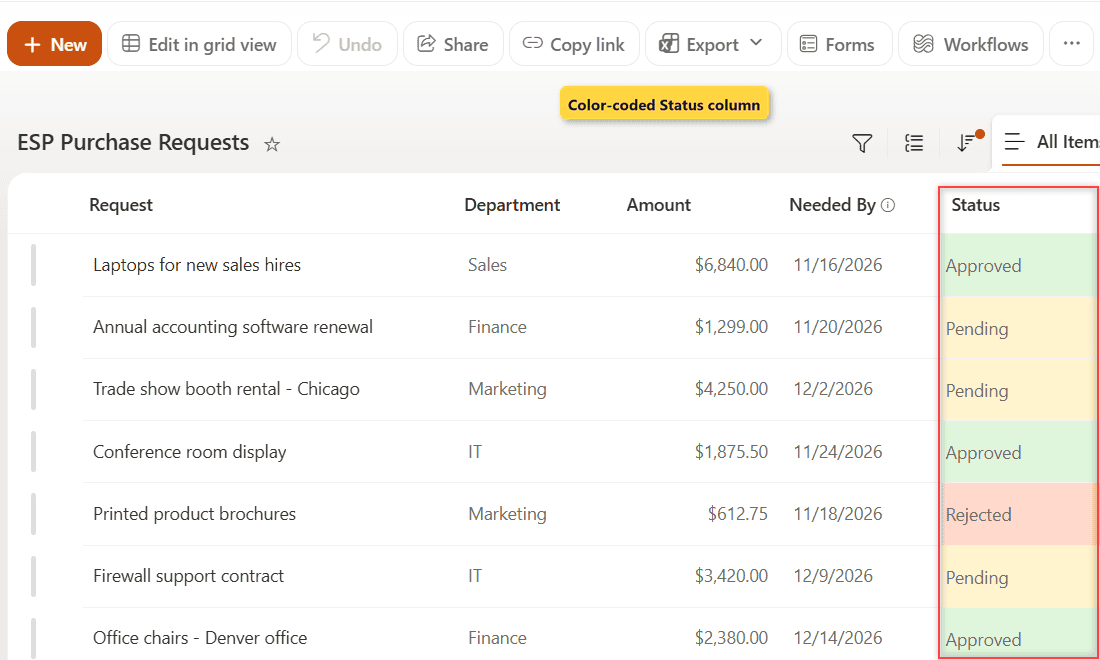
- 8 requests worth $23,377.25 in total, from laptops for new sales hires to a trade show booth in Chicago.
- Columns: Request, Department (choice), Vendor, Amount (currency), Needed By (date), Status (choice) and Requested By.
- Status formatting: Approved shows green, Pending shows yellow and Rejected shows red.
- Pending Requests view: 4 open requests worth $11,669.00, sorted by Needed By.
The formatting and the extra view are the tricky parts. They’re exactly what gets lost when someone copies a list by hand, so we’ll check them after every copy.
Method 1: Duplicate a list with From existing list (Recommended)
Use this when you want the same list again for a new year, team or project, but with fresh items. It’s built into both SharePoint and the Lists app (here’s how Microsoft Lists and SharePoint lists differ), and it doesn’t need an admin.
Here’s how I made a 2027 copy of ESP Purchase Requests:
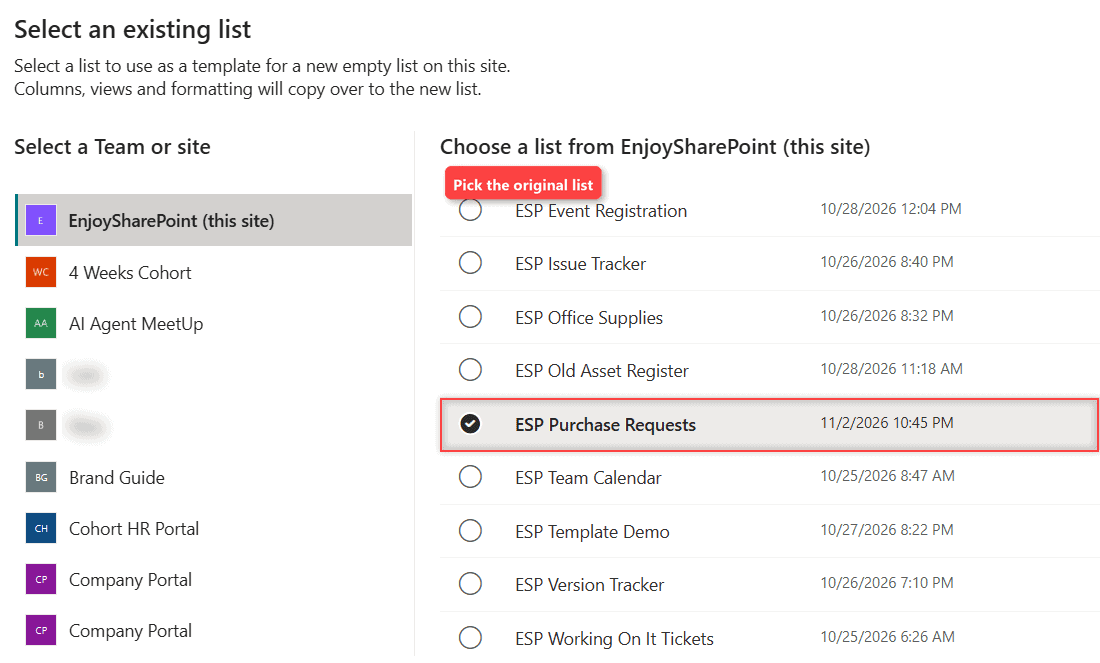
- Go to the site’s home page and select + New > List. (In the Lists app, select + New list.)
- On the How would you like to start? page, under Import from, select Existing list.
- In Select an existing list, keep the current site selected on the left, pick the list on the right, and then select Next.
- Replace the suggested name (it’s the original’s name, so SharePoint flags it as taken) with something like ESP Purchase Requests 2027. Clear Show list in site navigation if it shouldn’t appear in the left menu.
- Select Create.
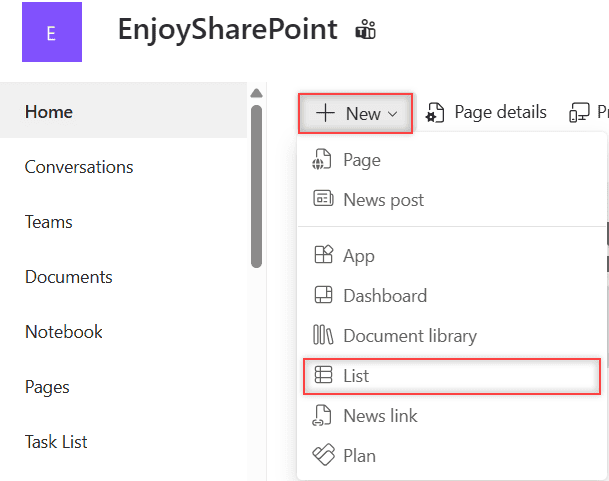
Microsoft’s help pages still call this option From existing list, but on my site the tile is labeled Existing list:
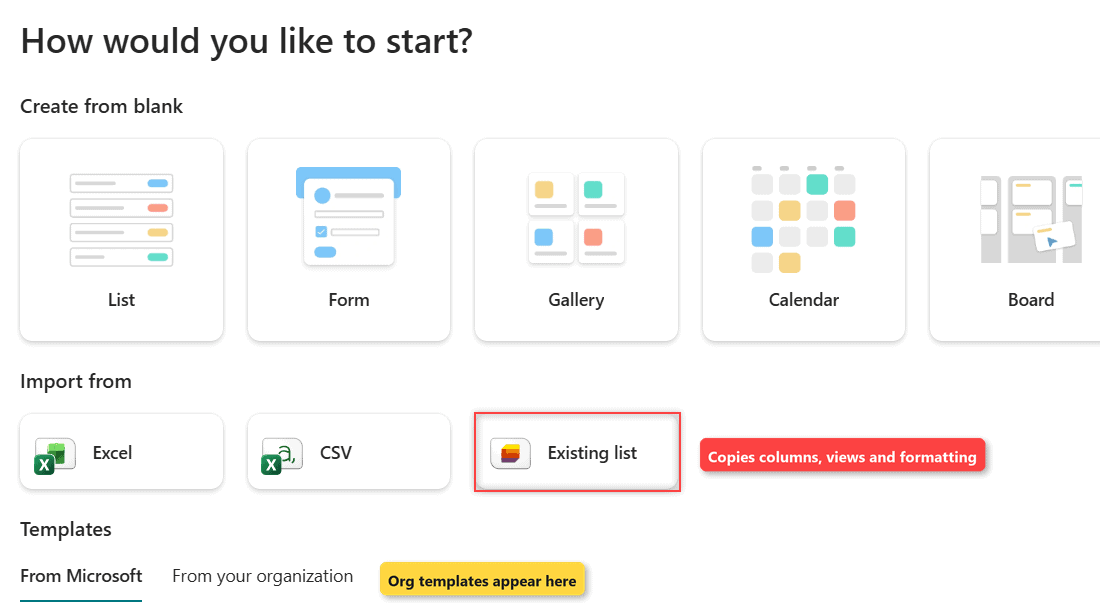
The next dialog lists the site’s lists. Select the one you want to copy:
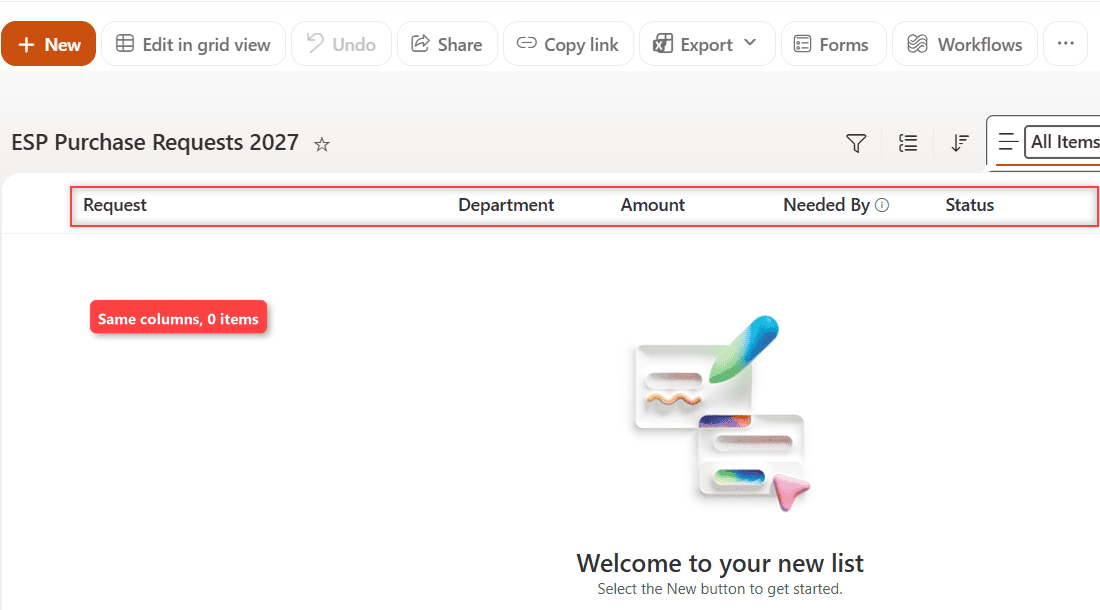
SharePoint opened the new list right away. It had every column, the Pending Requests view, and a Welcome to your new list message instead of items.
How does this work?
Existing list reads the source list’s schema, meaning its column definitions, views and formatting, and builds a new list from it. The dialog even says so: columns, views and formatting copy over to a new empty list.
In my copy, the Pending Requests view kept its filter and sort. When I added a row, Status defaulted to Pending and showed the same yellow formatting as the original.
So here’s the catch: list permissions don’t come along. The new list inherits the site’s permissions, so if the original had unique list permissions, set them again on the copy.
Method 2: Copy a SharePoint list to another site
The same option works across sites, which is handy when every department needs the same tracker. You start on the destination site, where the new list gets created.
- Open the destination site and select + New > List > Existing list.
- Under Select a Team or site, pick the site that holds the original list.
- Select the list, select Next, name the copy and select Create.
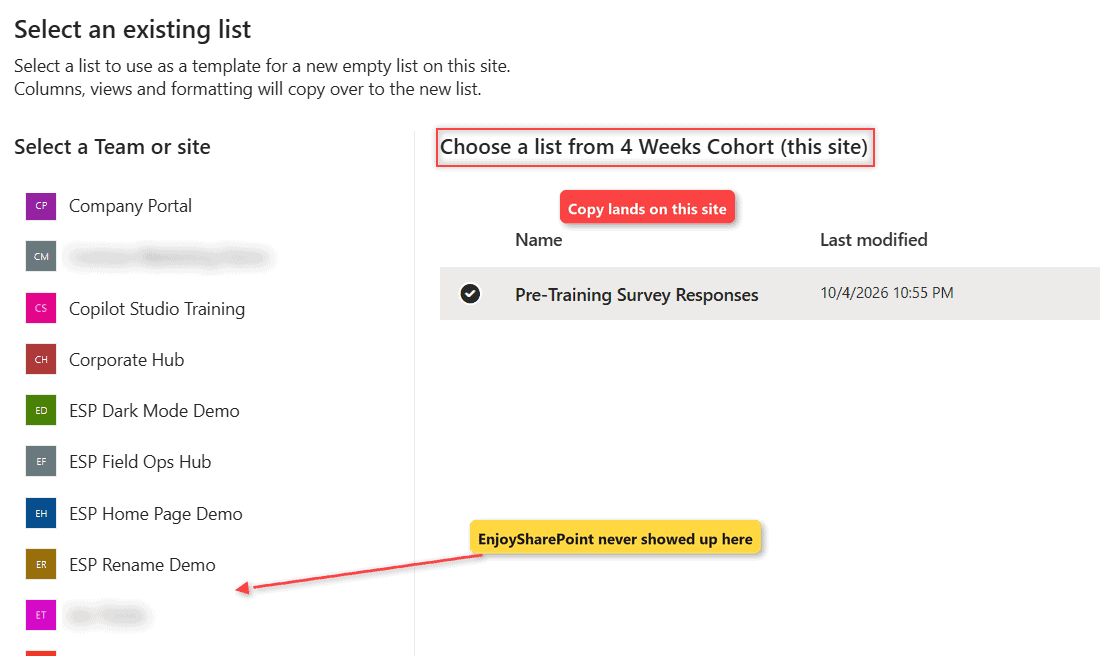
I tried it from my 4 Weeks Cohort site. The site list showed dozens of sites, but EnjoySharePoint, home of ESP Purchase Requests, never appeared, even though I own it.
How does this work?
You need permission to create lists on the destination site and to open the source list. If the source site isn’t offered, use Method 4 instead: export the list to a file and build the new list from it on the other site.
Important: a lookup column points at a list on the original site, so check it after a cross-site copy. And a copy isn’t a move. To retire the original, copy the items over and then delete the old list.
What a copied list keeps (and what it doesn’t)
Here’s what each route brought over in my ESP Purchase Requests copies.
| Item | Existing list | Export, then paste in grid view | New list from Excel or CSV |
|---|---|---|---|
| Columns and types | Kept | Uses the new list’s columns | Rebuilt from the file (check each type) |
| Views | Kept (lists with up to 80 views) | Only what the new list has | Default view only |
| Column and view formatting | Kept | Only what the new list has | Not kept |
| Items | Not copied | Copied (current view, CSV up to 30,000 rows) | Copied (up to 5,000 rows) |
| Rules | First two only | Not copied | Not copied |
| Permissions, version history, attachments | Not copied | Not copied | Not copied |
If you rely on JSON column formatting, Method 1 is the only route that keeps it without extra work.
Method 3: Copy the items with Export and grid view paste
Use this when the copy needs the data too. Run Method 1 first for the structure, then fill the empty 2027 list with the original items.
- Open the original list, make sure no items are selected, and switch to a view that shows every column, such as All Items.
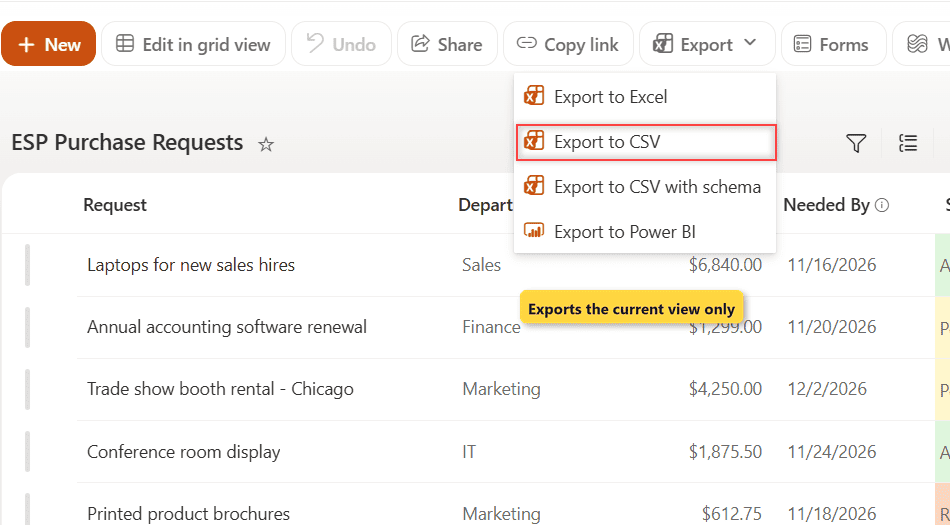
- Select Export > Export to CSV (or Export to Excel) and open the file in Excel.
- Put the columns in the same order as the new list’s view, then copy the data rows without the header row.
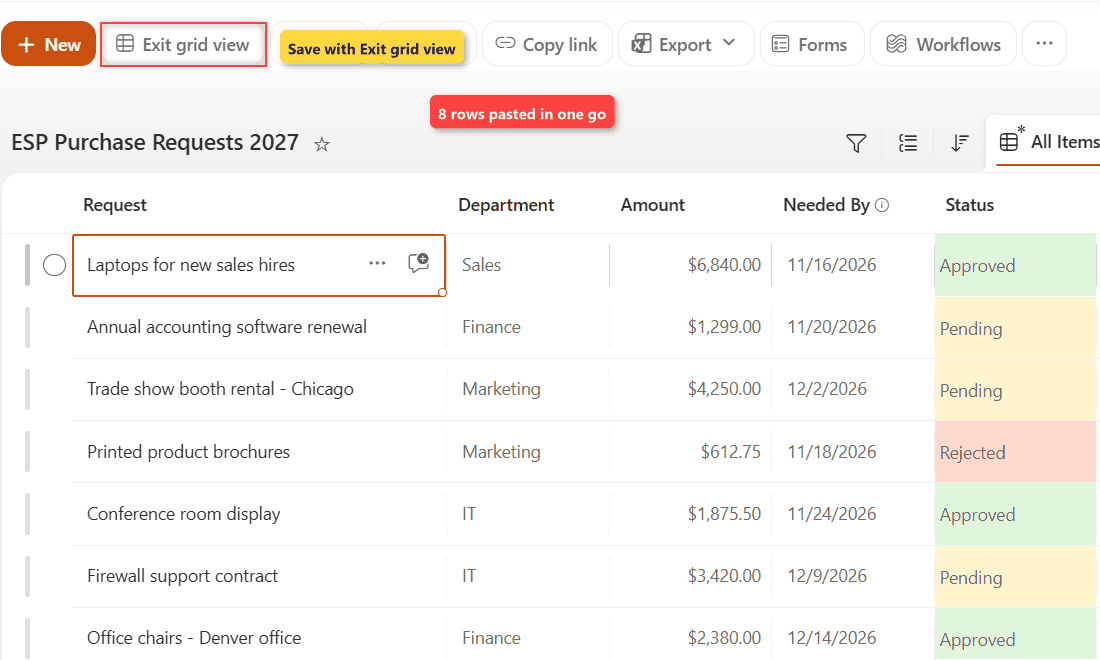
- Open the new list, select Edit in grid view and then Add new item.
- With the first cell of the new row selected, press Ctrl+V.
- Select Exit grid view.
I pasted all 8 rows in one go. ESP Purchase Requests 2027 ended up with 8 items worth $23,377.25, the same total as the original.
How does this work?
Grid view fills the columns left to right, starting at the selected cell. Each line on the clipboard becomes a new item, so the column order must match the grid.
Choice values must match the choices exactly, and Status kept its color formatting because the copied list already had it. Export only takes the current view, so a filtered view like Pending Requests gives you just 4 rows.
So here’s the catch: the pasted items get new IDs, a new Created date and you as the creator. If the copy must stay in sync, use a flow, like the one in updating one list from another with Power Automate.
Method 4: Create a new list from an Excel or CSV export
This gets structure and data in one step, at the cost of the formatting. It also works when the other site doesn’t show up in Method 2.
- Export the original list (Method 3, step 2). For Excel, format the data as a table (Home > Format as Table).
- On the site that should get the copy, select + New > List, then Excel or CSV under Import from.
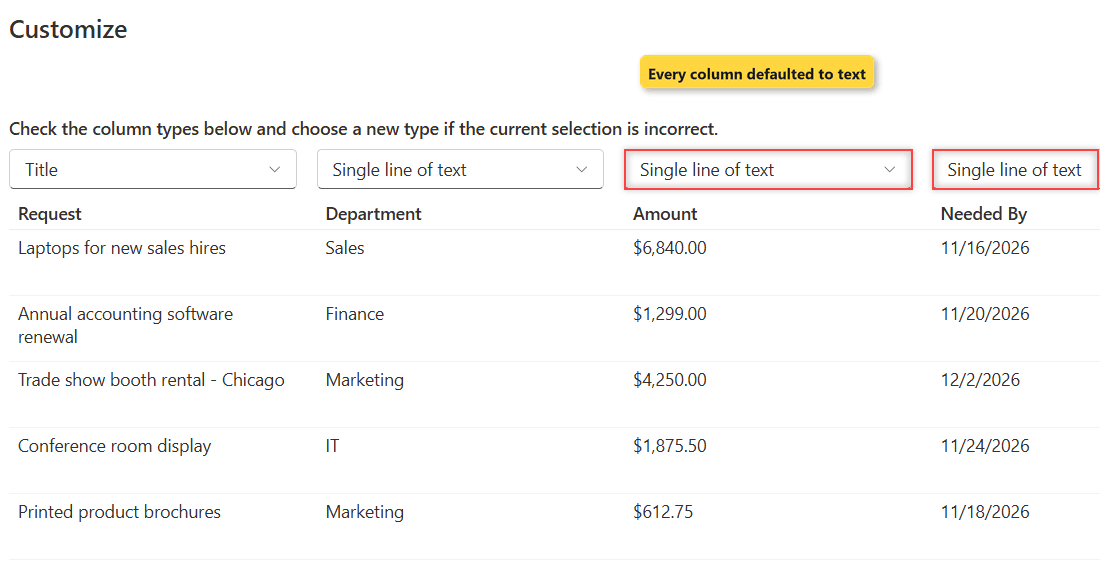
- Upload the file. On the Customize screen, check the column type above each column.
- Select Next, enter a name and select Create.
How does this work?
SharePoint guesses each type from the data. With my file, every column defaulted to Single line of text, including Amount and Needed By, so set Currency, Date and Choice here. The first column becomes the list’s Title column.
The uploaded file is saved in the site’s Site Assets library, and a table can have up to 5,000 rows. To add rows to a list that already exists, see importing Excel data with Power Automate.
Method 5: Save list as template (classic) and why it’s missing
Older guides tell you to open List settings and select Save list as template, with a box to include the content. That classic option saved the columns, views and even the items in one template file.
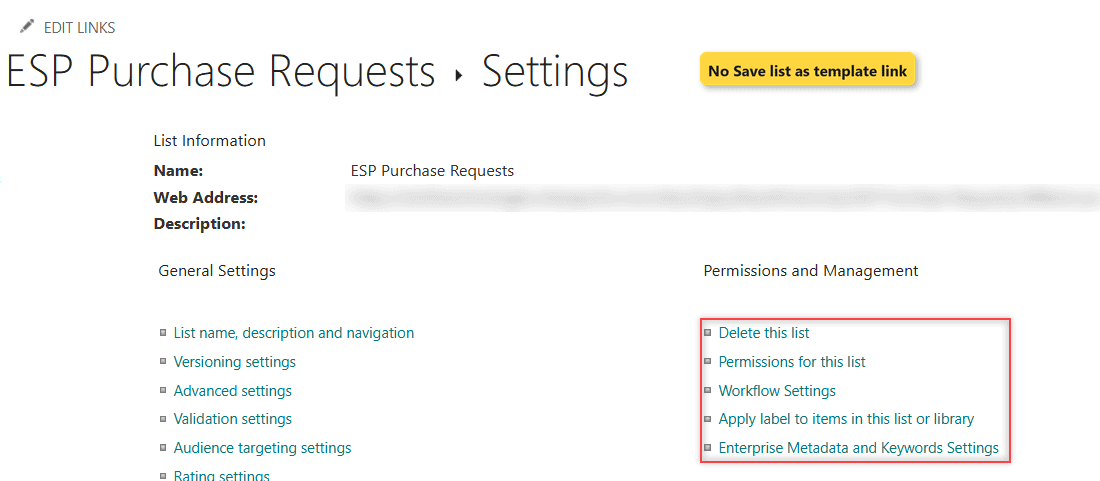
On my EnjoySharePoint site, the Permissions and Management section of List settings has no such link:
How does this work?
Microsoft hides Save list as template whenever custom scripts are blocked, and they’re blocked by default on modern team and communication sites. Lists you built from older templates still work.
An admin can allow custom scripts on one site, but SharePoint resets it to Blocked within 24 hours, so don’t build on this method.
The modern replacement is an organization template. Your admin turns a list into a template once, and everyone sees it on the From your organization tab when they create a list. Like Method 1, it copies the structure, not the items.
Pro Tip: If your team copies the same list every quarter, ask your SharePoint admin for an organization template.
Which method should you use?
| You want to | Use |
|---|---|
| Same list again, empty, on the same site | Method 1: Existing list |
| Same list on another department’s site | Method 2 from the destination site, or Method 4 |
| A full duplicate with all the items | Method 1, then Method 3 (CSV + grid view paste) |
| A quick snapshot with data, formatting not needed | Method 4: a new list from Excel or CSV |
| A standard list everyone in the company can create | Method 5: an organization list template |
| Items copied automatically as they change | A Power Automate flow |
I’d pick Method 1 and add the data only when it’s really needed. An empty copy keeps old items out of the new process.
Things to Keep in Mind
- 80-view limit: Existing list won’t copy a list with more than 80 views, so delete old personal or test views first.
- Rules: only the first two automated rules come over. Open Automate > Rules on the copy and recreate the rest.
- Flows and Power Apps forms stay connected to the original list. Point them at the copy yourself if you need them there.
- Views with filters: a filtered view like Pending Requests exports only its own rows, so export from a full SharePoint list view.
- Attachments and version history never come over with these methods, so keep the original list until you’ve checked the copy.
Once your copy is ready, these will help you set it up:
Frequently Asked Questions
Does copying a list from an existing list copy the items?
No. It copies the columns, views and formatting only, so the new list starts empty. Export the items and paste them in grid view, or create a list from an Excel or CSV file if you need the data too.
Can I copy a SharePoint list to another site?
Yes. Open the destination site, select + New > List > Existing list, and pick the site that holds the original. If that site isn’t listed, export the list and create the copy from the file instead.
Why don’t I see Save list as template in List settings?
Custom scripts are blocked on the site, which is the default for modern SharePoint sites. Use the Existing list option, or ask your admin for an organization list template instead.
Is there a limit on which lists I can copy?
Yes. Microsoft blocks lists with more than 80 views and copies only the first two rules, as its Create a new list based on another list article explains.

I have worked with Microsoft technologies for more than 18 years, including SharePoint, Microsoft 365 and the Power Platform (Power Apps, Power Automate and Power BI), at companies like HP, TCS and KPIT. I started EnjoySharePoint in 2011 to share the solutions I build in real projects with readers in the United States, Canada, the United Kingdom, Australia, New Zealand and beyond. Microsoft has recognized this work with the Microsoft MVP award 13 times since 2014.