
By default, SharePoint team sites are private, which means only specific people or groups can access them. We can make a SharePoint site public, allowing everyone in the organisation to collaborate, share files, and get information easily.
Private sites are helpful when working on confidential projects, but they can make it difficult to share or work with others across the company. If your team is finding it hard to access important documents or share information easily, it might be a good idea to make the SharePoint site public instead of private.
In this tutorial, I will explain to you how to change a SharePoint site from Private to Public step by step.
Change a SharePoint Site From Private to Public
Navigate the SharePoint site to change. We can check the current privacy status from the upper-right corner.
- If it says “Private group,” then the site is Private.
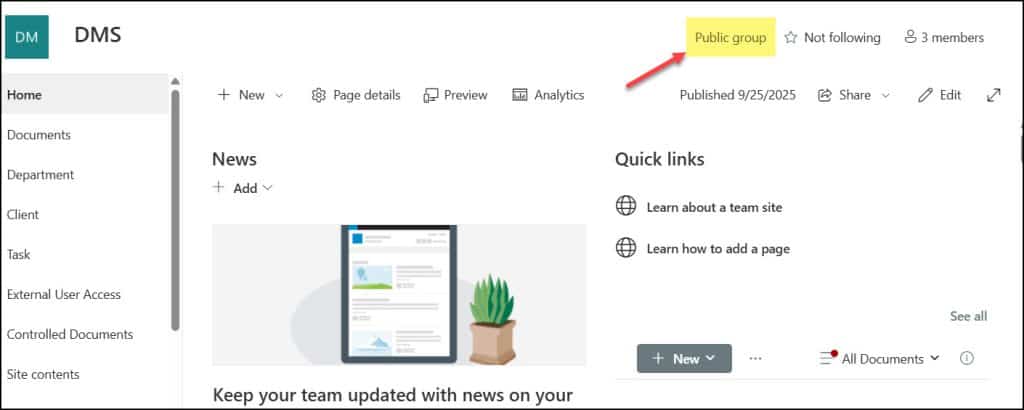
- If it says “Public group“, then the site is Public.
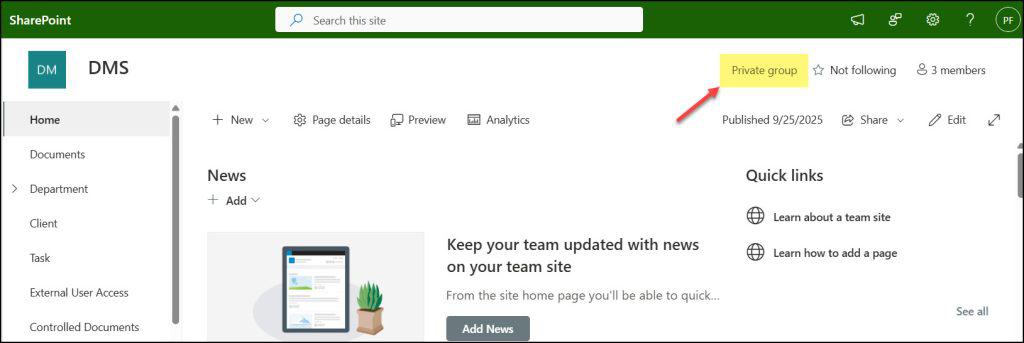
To change a SharePoint site from Private to public or viceverse, there are two ways to achieve it:
- From SharePoint Site information settings
- From SharePoint Admin Center settings
From SharePoint Site Information Settings
The best way to change the SharePoint site’s privacy settings is directly from the Site Settings.
- Open the specific SharePoint site that you want to change. Click on Gear settings icon from right top corner.
- Click on Site information.
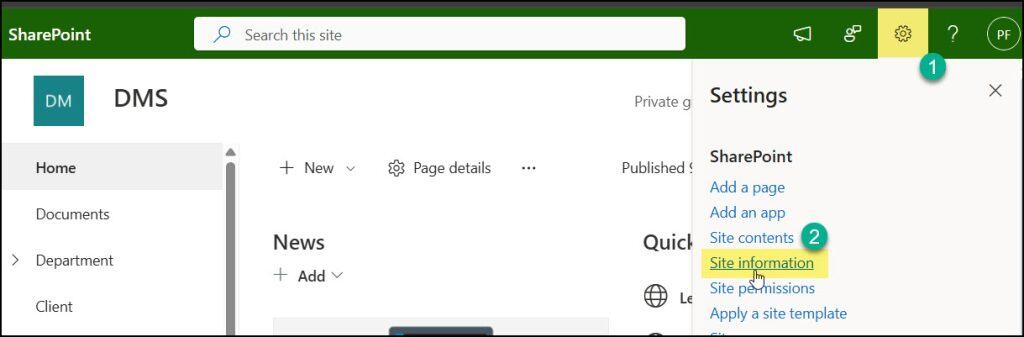
- Under Site information pane, expand Privacy settings and switch it to Public as shown below. Click on Save.

- Now, you can see the specific site privacy settings has been changed to Public group.
From SharePoint Admin Center Settings
To change a site from private to public in the SharePoint Admin Center, you must have SharePoint Administrator permissions. Otherwise, you won’t be able to make this change.
Go to Active sites under the Sites -> Select the specific site you want to change -> Settings -> Select Public under Privacy settings -> Click on Save.
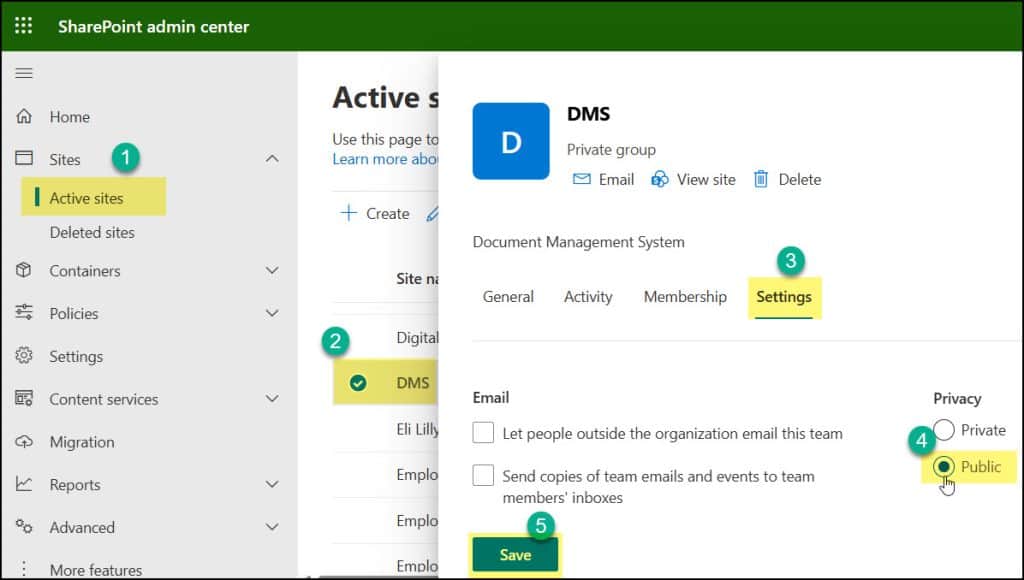
Once you click Save, go to the specific SharePoint site. You can see the Privacy settings have been changed to Public.
I hope this article has helped you learn how to change a SharePoint site from Private to Public using two approaches: Site Information settings and the SharePoint Admin Center, step by step.
Also, you may like some more SharePoint tutorials:
- Enable Item-level Permissions in a SharePoint Document Library
- Customise SharePoint List Toolbar Buttons
- Enable Audience Targeting in SharePoint Site Left Navigation
- Retrieve Current User Information in SPFx

Preeti Sahu is an expert in Power Apps and has over six years of experience working with SharePoint Online and the Power Platform. She is the co-author of Microsoft Power Platform: A Deep Dive book. As a Power Platform developer, she has worked on developing various tools using Power Apps and Power Automate. She also makes Microsoft 365 videos and shares them on YouTube.

